Hey, guys, Randy with Pete’s RV TV today. Today, I want to talk a little bit about surge protection. So, something that you guys may not know about me is I’m actually an electrician by trade. So, every RV dealer has a guy like me who has been around for a million years and he is kind of the fix it guy or the go-to guy, where the hard questions usually gravitate towards that gentleman. I’m that guy at Pete’s RV. So, they’d be coming to me. But the thing that I bring to the table as I just mentioned is I used to build custom homes and I am an electrician by trade. So, when it comes to the electrical side of things, I really know what I’m talking about from my former life. So, I’m the guy that they bring in when they talk about surge protection and what kind of surge protection that we’re going to carry as a dealer group.
I’ve played with them all. I’ve played with all the big names out there, and we have ended up with the Hughes Watchdog. Hughes makes an incredible product. I’ve actually met with the owner of Hughes, gentleman named Pat. He’s actually a friend of mine now. And the product that he brought to the table I felt was so far superior to the other stuff out there, we took it on. And as I learned more and more about it, I just kept knowing that I made the right choice because it is a great product. One of the things that the Hughes Watchdog does is it protects us from surge. So, if there is a lightning strike down the road or nearby, this is going to protect anything that’s coming in on those negative lines, on the ground wires, or the high voltage is coming over on the positive side of things. Nothing will protect you from a direct lightning strike, but if there’s something nearby and you can be protected from it, the Hughes Watchdog is definitely going to do that.
One of the really cool things about the Hughes Watchdog is protecting you on those surges, is it actually the Joules, the absorption material that takes those hits is replaceable, where with the competitors, it is not. Once those Joules of that absorption portion of the surge protector is worn out, you need to replace the whole detector. Where this guy here, we can just replace the absorption of the Joules portion of it. The Power Watchdog is going to run at equal or better than its competition out there. When it comes to absorption, they’ve actually just changed. So, depending on when you purchased, they’re offering a little bit more than they once did, which again is in line or better than the competitors out there.
The other thing that the Hughes Watchdog does for us with the EPO, emergency power off, and this is probably going to come into play more often than we would with the typical surge on it, is low voltage, high voltage, reverse polarity or no ground. It is going to protect us from all that. All very important things. This guy will shut power off if it doesn’t like something. So, at 103 volts, so say on a busy weekend at a campground, we can see very low voltage. Everybody gets to the campground, everybody throws on all their air conditioners or electric hot water heater. The griddles go on, the coffee makers, everything that you need to go camping that we brought from home, we bring to the campground and we turn it on when we get there, which can actually put campgrounds into a low voltage situation or a brownout.
When I say brownout, I mean below 103 volts. So, electricity is an amazing thing. Electricity will still function at low voltage. It will still pass at low voltage, but at low voltage it creates high amperage. High amperage creates high heat. High heat will prematurely wear out your electrical components, especially your inductive loads like your air conditioner motors and things like that, things that are very expensive to replace. So, with the EPO here, it will protect you from that. It will actually shut power off, not allow power to pass if it doesn’t like something, or it’s in a spot where we feel that it’s damaging your coach. When we can throw this thing into alarm here, also has Bluetooth, so it’ll go to your phone. So, if you’re within Bluetooth range of the Watchdog, it will come right to your phone.
I’m going to hook this device up to my phone right here. And if you can zoom in on this, Cam, we are going to see the incoming voltage on both legs of that 50 amp Watchdog. I’m not pulling any amps right now, because I’ve got nothing plugged into it. And the frequency in North America is 60 hertz, so we’re running right there where we’re supposed to be on that. Let’s throw this thing into an alarm so we can see it come up. So, I have just removed the ground from the Watchdog. We can see the Watchdog is turned red, but immediately it has hit my phone as missing ground. And has actually shut power off going through the Watchdog, so no power is passing to the camper right now. And I have an alert on my phone within Bluetooth range saying what’s going on.
And it will work for you whether you’re in Bluetooth range or not, but it will tell you what’s going on if you’ve got it tied to your personal device. Once power has been restored or it likes what’s going back on, in about 90 seconds it will just make sure that everything is safe and then it’ll allow power to pass again. So, that’s how the EPO works. No ground can put you into a hot skin situation. So, very dangerous situation. And again, why it doesn’t want to pass, high voltage above 132 volts, doesn’t want to see that. It will shut power off. Low voltage below that 103 that I referred to earlier, it’s going to shut it off.
So, this thing is going to work continuously for you to protect your investment and make sure that you don’t end up in those service bays, which we all know are a little bit cumbersome to get into and sometimes take longer than what we’d like to get back out of them. So, I recommend the Hughes Watchdog for any camper out there. I personally like the hardwire version, because it is working for you all the time. It is wired permanently into your camper. It can’t be stolen. It is not in the elements. It can’t be damaged for transport. So, the hardwire version would be my recommendation and definitely the Hughes Watchdog. Thanks for watching Pete’s RV TV with Randy today. I look forward to seeing you on the road.
Follow The Yellow Shirt on social media to stay up to date on all things Pete’s RV!
Pete’s RV Center is an exceptional dealership group serving the United States and Canada since 1952. With multiple locations, Pete’s RV provides sales, service, parts, accessories, and education to our community of RVers all across North America.
It’s that time of year again: time to dump lots of brightly colored liquid into all of your RV drains. You Need Antifreeze! What do you need to know about it?
RV and Marine antifreeze, conveniently packaged in the same bottle, surprisingly doesn’t protect against freezing, which isn’t necessarily harmful. It’s designed to prevent bursting, the plumbing damage that comes from ice freezing, expanding, and then rupturing. A rupture can result in gallons of pipe water flooding into the RV, causing a headache of damages.
“RV antifreeze rated for -50 F and -75 F will start to freeze at around 20 F, but it won’t freeze to the burst point until -50 F or -75 F respectively.
In parts of the country where temperatures go into minus digits and stay there you should use the -100 F antifreeze for added protection. This type freezes at about -20 F, but provides burst protection to -100 F.” Said girlcamper.com.
The most important part of using antifreeze is draining as much water or waste liquid from the pipes as possible. Antifreeze mixed with diluted water from an undrained pipe will burst far sooner than the temperature estimates on the bottle that assume there’s little to no water in the pipe.
After winter is over, you can fill your pipes without water once again without worrying about draining the antifreeze, which is typically nontoxic. Of all the preparation your RV needs for winter, put antifreeze–and saving your pipes–at the top of the list.
For more tips about winterizing your RV, check out our Winterization Tips with Pete’s RV Guru Randy Murray.
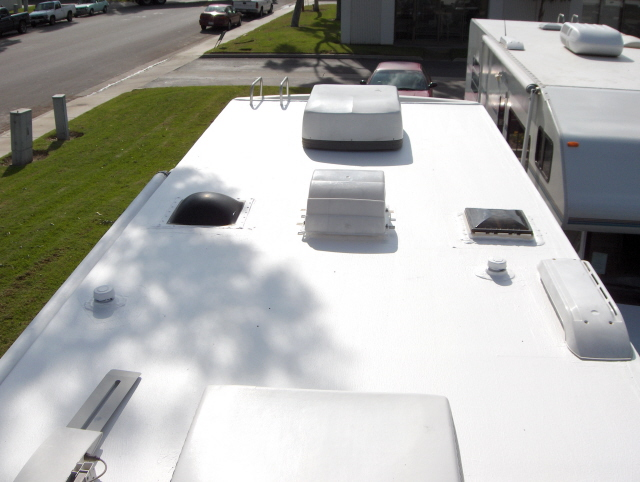
Out of sight, out of mind is not a cliche that should be applied to RV roofs. They should be cleaned several times per year, and inspected for any potential issues.
During cleaning, scrub your RV roof with a medium bristle brush, or any other brush recommended by the manufacturer. You can use a cleaning liquid while doing this, but be sure not to use cleaners made with petroleum solvents, abrasives, or citruses, as those will weaken the strength of the roof materials.
After scrubbing, rinse the whole RV thoroughly, both roof and exterior walls. Any grime dripping off the roof will go down the exterior walls, and if not rinsed, will leave ugly stains.
Inspecting the roof while cleaning is vital, and should be done thoroughly. Check all sealants and seams, skylights, vents, and roof rack for mold and cracks. Fix any rips or tears immediately, before they snowball into other problems.
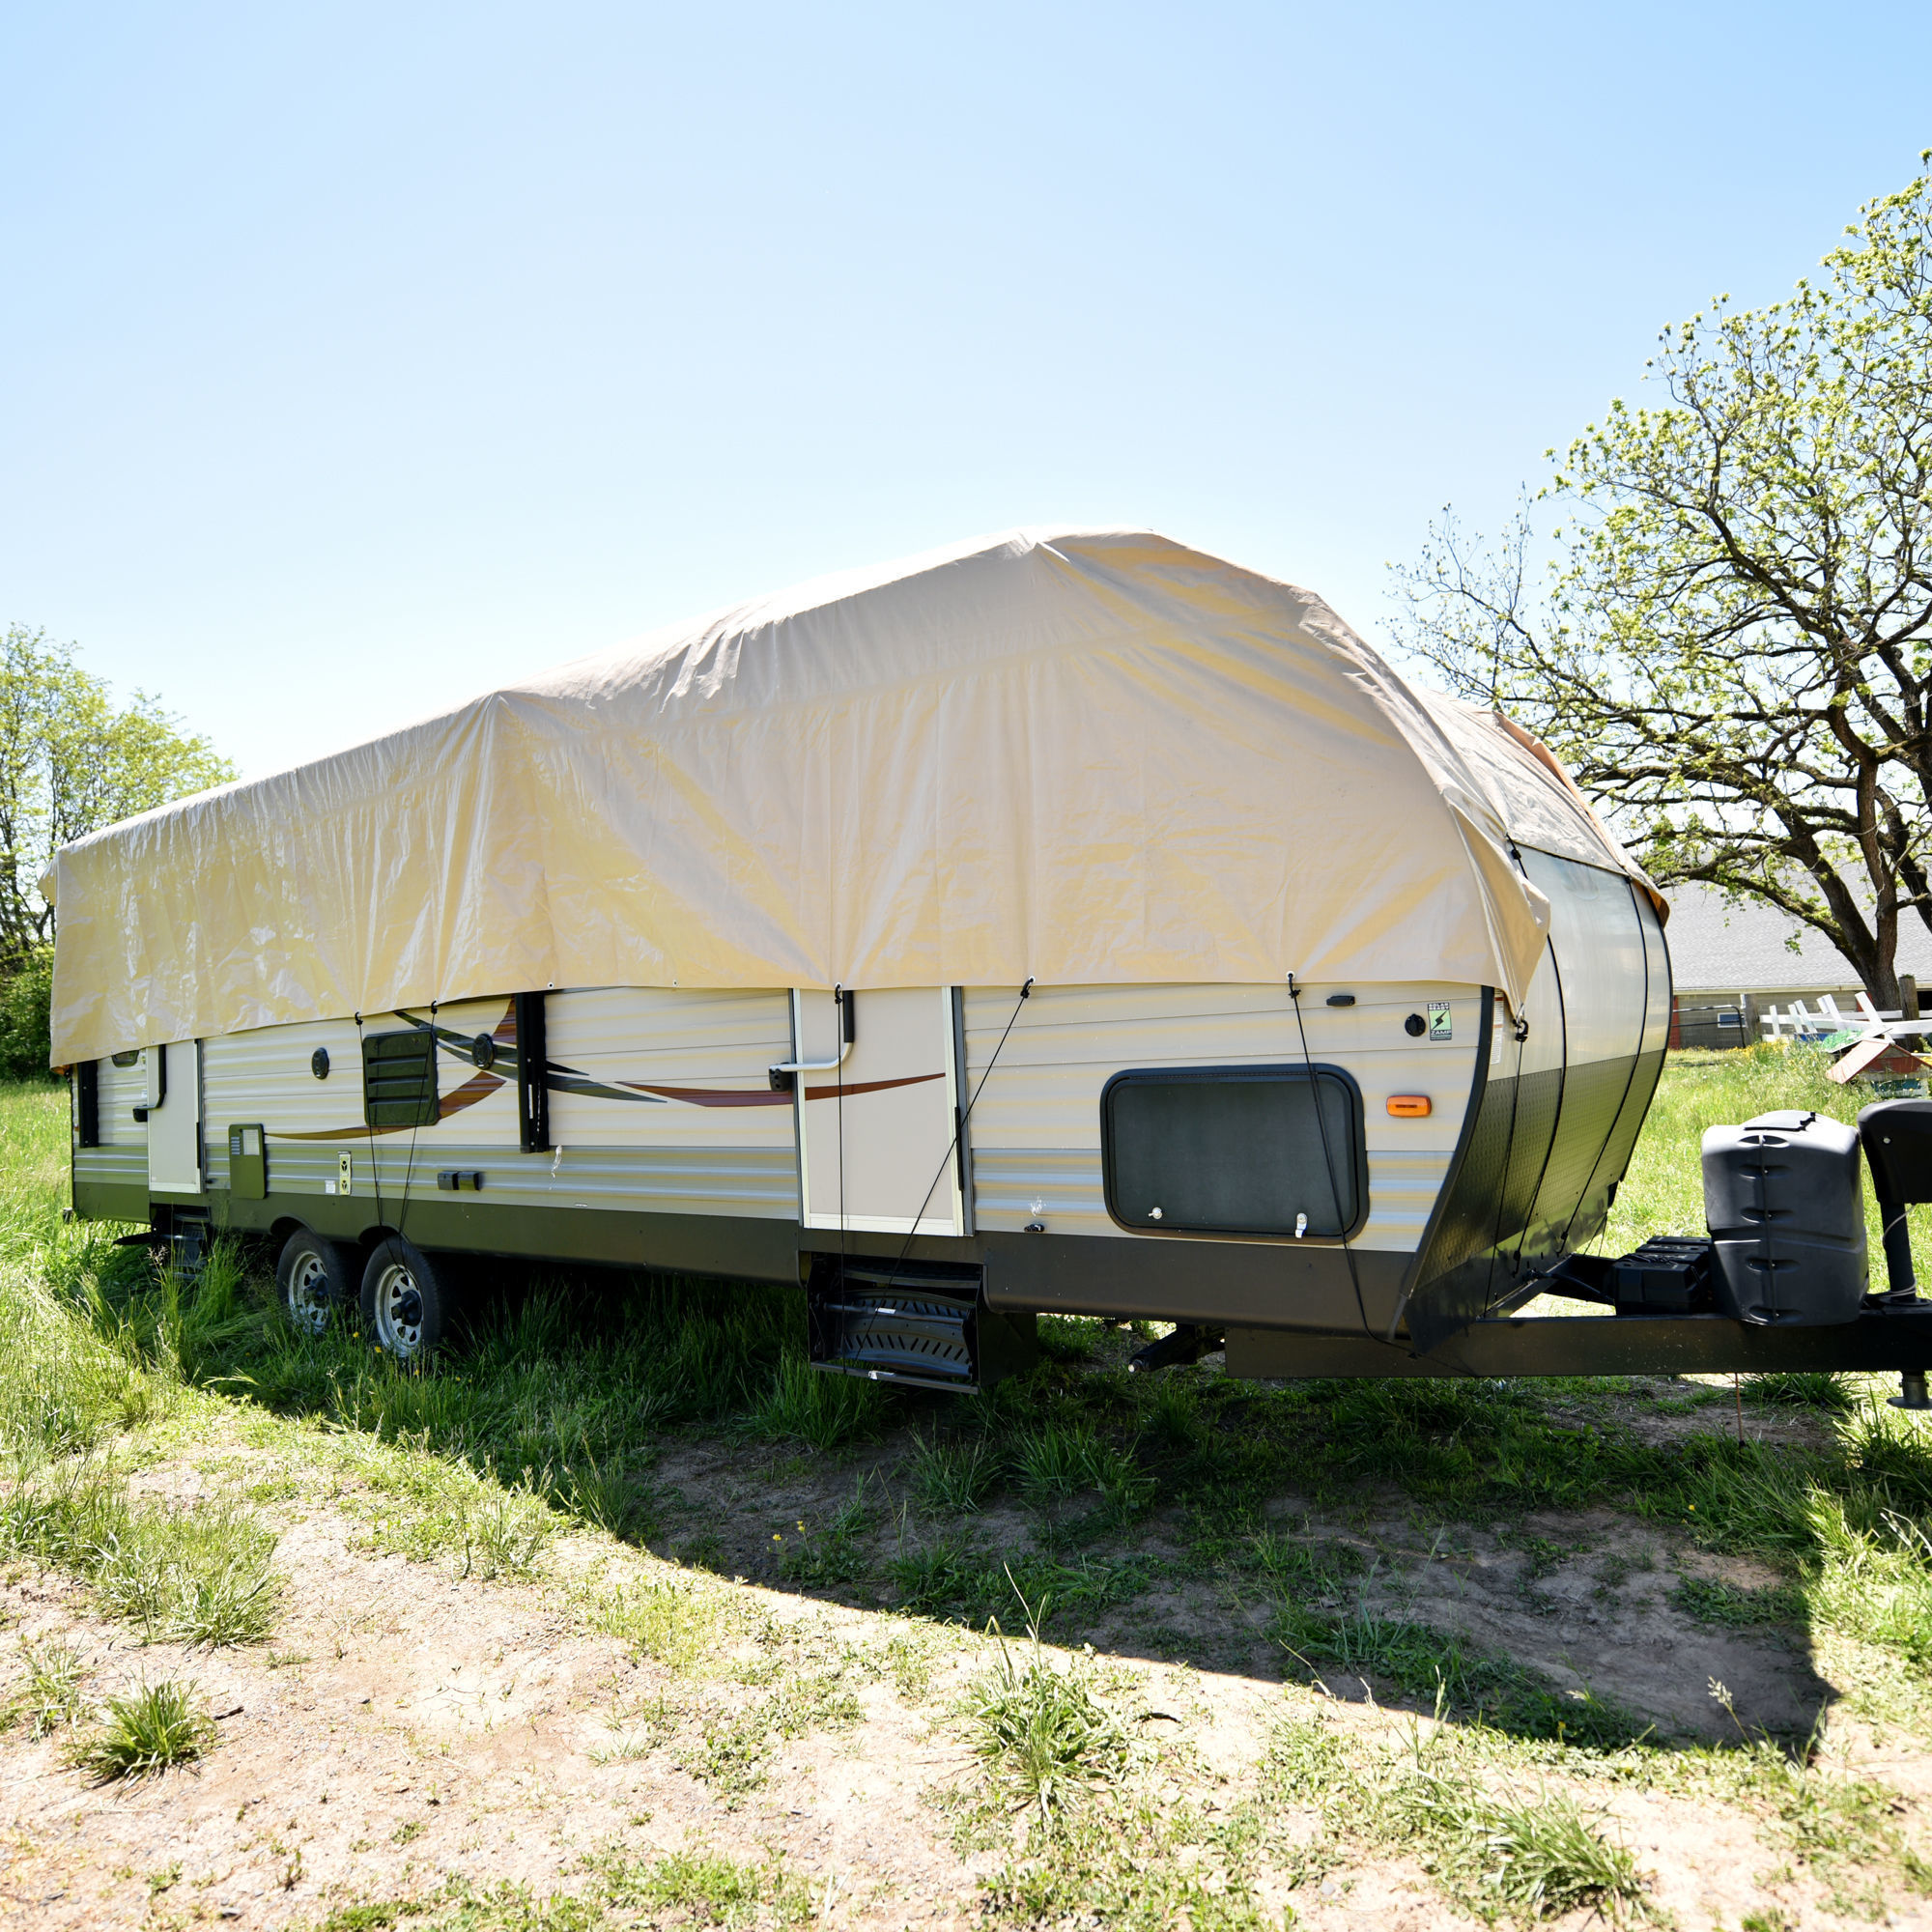
To passively protect your RV roof from weather damage, keep it away from weather, and avoid the sun! RV storage facilities are ideal for protection, but RV roof covers will separate the roof from the elements. Be sure to use a proper RV roof cover and not any other kind of tarp, which can reduce airflow and result in mold.
At Pete’s RV Center, we have all of your RV maintenance needs in mind. Visit us at petesrvcenter.com to find a location near you!
The contagious and ugly look of rusted metal is a frequent source of panic for boating enthusiasts, but often ignored by RV owners. Expecting zero rust to develop on your well-loved RV is a little too optimistic. Rust comes from many sources, most of which are easy to solve. To manage this rust, and avoid the damaging corrosion it can cause, the first step is keeping your eye out for rust’s causes.
Rust can develop on any exposed metal surface. This means that any tiny scratch on the RV’s exterior coat of paint is susceptible, in addition to everything going on in the rarely visible undercarriage below your RV. When driving around the country on the adventures you love, you’re more likely to have scraped the undercarriage of your RV than you might think, even if you’ve never noticed. It’s not just rocky off-roading that’ll ding up your unit. Speed bumps, loose gravel, and even roadkill can all create enough scratches to make rust a relevant risk.
Even without damage from exposed metal, road salt in places fighting snowfall and sea salt by the coast can create rust on the undercarriage and frame. Inside the vehicle, condensation from simply breathing in your RV can create rust on the windows, and on any exposed metal inside.
By now you might be a little afraid of your own RV, but all this rust is easy to prevent, now that you know where it could be. Locating exposed metals is key: take a slow walk around your RV at least once a week whenever you’re using it and look for any exterior scratches, then touch them up with a coat of paint or get them professionally repaired, if necessary.
A fundamental rust prevention technique is rinsing your RV’s undercarriage, whether at the car wash or with your own hose. If possible, mixing baking soda in your rinse water can even help neutralize any damage salt has already created.
Undercoating your RV will protect it even further, and stop the spread of any rust that might already exist. This can be done with something as simple as the Undercoating in a Can spray. Look at all mechanical components beneath the RV, as they are the most susceptible to corrosion, another problem to take care of that usually signals nearby rust development.
If you find an existing rust formation, a stiff wire brush will scrape it off after a few minutes of work. When it’s removed, keep practicing your rust prevention skills by covering the exposed metal with the rust-inhibiting paint you use for touch-ups.
If you spot a large area or rust or corrosion, don’t try to patch it all up by yourself. The metal in the area could be weakened, creating a safety hazard that needs professional repair. Your local RV store can take care of it easily.
At Pete’s RV Center, we’re here to take care of all your RV sales and maintenance needs. With dealerships in Vermont, Massachusetts, Connecticut, Pennsylvania, and Indiana, petesrv.com has you covered!
One of the most important things RV customers demand is a clean and healthy environment. Studies have shown that the interior of vehicles may contain more than 1,500 times the amount of bacteria as the average house does. RVs provide a wonderful environment for harmful germs and bacteria to thrive and to multiply.
Speaker 1 (00:31):
The National RV Care interior products are water-based, environmentally friendly products that are EPA registered and kill 99.9% of germs and odor causing microbes, bacteria, mold, and mildew, while providing a high performance barrier against stains for five years. These eco friendly products not only help protect against oil stains, food and beverage stains, and vinyl fading, they also help prevent odors caused by bacteria, microbes, mold, mildew, fungi, and algae. These anti microbial products for the interior of RVs are extremely green, they are non toxic, non flammable, non hazardous, and don’t contain any VOC’s.
The transcription of this video is available here.
At Pete’s RV Center we care for the quality and cleanliness of your RV. Stop by for more sanitation strategies, and to view our excellent selection of RV units.
Pete’s RV-TV YouTube Channel resident Randal Murray delivers a crucial RV question: “What is the importance of slide toppers (aka slideout awnings)?”. When it comes to protecting the vitality and value of your RV, slideout seals found around the slide are the lifeline to the health and well-being of your camper. As Randy explains, if you compromise or damage those seals then you risk water potentially penetrating into the camper provoking damage over time. Randy presents a prime example of just how well slide toppers can defend your camper after a weekend at the campground. Sprinkling a box full of debris on the slides to simulate a weekend of buildup, you can clearly see that everything rolls off as the slides are brought in.
A highly-affordable investment, slide toppers can save RV owners thousands of dollars in repairs! For just a few extra dollars a month, their installation can be built right into your new RV payment plan.
Video Transcript for “The Importance of RV Slide Toppers”
Randy: Hey, guys, Randy with Pete’s RV TV here again today, another quick tip segment for ya from Pete’s RV Center. We’re in the shop today at Pete’s RV, the Vermont location. A little noisy place, very busy place this time of year, as it always is. Today I’m gonna talk about the importance of slide toppers and how they can protect your coach, especially as you start to get some age on the coach.
A slide topper covers a slide topper, it covers a slide box, which, it keeps all the elements off the top of your slide, rain, snow, whatever, if your slide’s open in poor weather. It keeps the sun off the top of your slide, so it’s gonna lessen the maintenance that’s needed to be done on the slide roof itself.
It could help with a potential leak on a slide box. If you were to have a leak, when the water pouring right on this, obviously it’s gonna rear its head into the coach very quickly. With a slide topper on here, we’re not going to have water puddling against our seals and things like that, so it’s gonna really help out with that effect as well.
As you can see, the slide topper here is gonna attach to the body of the coach, comes in the, the roller tube is on the outside of the coach. So as we roll this in, any debris that is on the top will also fall off, and I’ll show you that in just a minute. We can also see how it keeps the roof of the slide out of the elements, another important feature, as I just mentioned.
So when we’re camping up here in the Northeast, especially state campgrounds, things like that, most campgrounds around the country, actually we’re gonna tend to be around some trees. Pine trees are a particular favorite up here in the Northeast. So when we’re out there, we have our slides open, we’re staying for a week or so on our family vacation, sticks, pine needles, leaves and things like that are gonna come down and get on the top of the slide roof.
And when we close our slide without a slide topper, all that debris stays up on the roof unless you get up there and clean it off. When that happens we’ve actually compromised our seal with the slide closed, we bring the unit back home, sits next to the garage for a few weeks until we get to go back out on our outing, with a compromised seal, we’re gonna see some water on the floor.
So let’s take a look up on the roof, and we’ll show you how this kinda works. Okay, so here we are up on the roof of the unit with the slide topper on it, and, We re-situated Josh so you can see the top of the slide topper, and you can see that no real portion of the top of the slide’s exposed. The slide topper is covering everything, which is what we want.
So right now what I’m gonna simulate what would happen if you’re camping up here in the Northeast, and I’m just gonna take some debris that I kinda picked up outside there a little while ago, and I’m gonna put this on top of the slideout. Now normally with a slide topper, this would all end up on the roof of your coach.
As I mentioned a little earlier in the video, when you bring this back in, all that stuff is gonna stay up there and compromise our seal, and potentially damage the seal, and that’s not something that we want. Those seals are very important for protecting our coach when we’re not using it.
So let’s go downstairs again and we’ll re-situate the camera, and we’ll show you what happens when we bring the slideout in, and why this works so well, and why it’s so important to have these on our units. Okay, so here we are down below, and as you can see, we’re using our new brand–new Outback Fifth Wheel as our test model, so kind of excited about that.
Let’s go ahead and bring in the slide, and we’re gonna watch how this guy protects our coach. So as you remember in the video, I poured some stuff up there, and you can see with having the roller tube on the body of the slide, everything is just gonna run right off, so we’re gonna protect our slide seals. We’re not gonna leave any debris up there to compromise those and cause potential leak down the road.
And there’s the slide closed. Everything on the ground, not on the roof, right where we want it. We’ve protected our slide. Everybody’s happy. We can put this away knowing that we’re not gonna have any damage to our seals or any water inside the coach from the roof of that slide when we’re not using the coach.
So there we go, folks. Another quick tip segment with Randy from Pete’s RV Center. Thanks again for watching our quick tip videos, and make sure to check us out on Facebook, and keep an eye out for those new videos. Thanks for thinking Pete’s RV, and happy camping.
Pete’s RV Center is an exceptional dealership group serving the United States and Canada since 1952. With multiple locations, Pete’s RV provides sales, service, parts, accessories, and education to our community of RVers all across North America.
Pete’s RV-TV YouTube Channel resident Randal Murray is here to provide expert instruction on how to winterize your RV water system for end-of-season storage. Demonstrating on a Keystone Bullet Premier 19FBPR travel trailer, Randy takes viewers through all of the critical steps for properly winterizing your camper including: Tank Draining, Bypassing the Water Heater, Introducing RV Anti-Freeze to Lines, and Pressurizing the Water System. Please remember that this is a basic RV winterization demonstration. All campers come equipped differently, so be sure to consult with your owner’s manual.
Video Transcript for “How To Winterize Your Camper”
Randy: Hey, folks. Randy with Pete’ RV TV here again today, your local internet dealer. As you’ve probably noticed, the kids are back in school and the leaves are starting to change color, so it’s time for us to start thinking about winterizing our campers. So today’s segment, I’m going to take you through this brand new Bullet Premier and I’m going to have, teach you how to do a basic winterization. I’ll go through, the tools necessary and all the steps to, show you guys how to winterize your RV.
All right. So, back in my days in the service department, these are the things that I would kind of take with me to go an do a winterization, so I was prepared to do any camper that was out there. So, as you can see, I’ve got my screw gun with a #2 screw tip in it to access the back of the hot water heater once we get to that stage. I’ve got a couple pair of channel locks here. And the out hood of the hot water heater has got a plastic plug. That’s how I would pull those out. Suburban hot water heaters have an anode rod in it, 1-1/6″ socket. Depending on which water pump we had, either a jet pump or a sure flow pump. Sure flow pump’s going to be a 1/2″ male pipe thread fitting. Jet pump’s going to be a quick connect fitting. So you’re going to want to check out what kind of pp and what kind of water heater you got to provide yourself with the proper tools, before you go ahead and winterize. I’ve also got a roll of paper towels here to clean up my mess when I’m done. Couple gallons of antifreeze, and I’ve done thousands of these, so I can usually get by with two gallons. You may want to get yourself three or four if it’s your first time out there. Just make sure you’ve got enough. It’s not fun to run out in the middle of the job when you’re not quite done, so just make sure you’ve got enough product to do the job.
Okay. So here we are, at our hot water heater. And the first thing you want to do when you winterize your camper after you know you’ve got all the proper tools is, we want to empty all the tanks. So we want to empty the fresh water tank, the black water tank, the galley and the gray tanks, and most importantly, our, our hot water heater tank. So, this guy here happens to be the Atwood with the plastic plugs, so we’re going to use our channel locks on this one. One very important thing before you empty your hot water tank is, if you’ve got an electric hot water heater element, we want to make sure that that device is shut off. Once we drain the water out of this tank, if this camper gets plugged in, that element will come on, and with no water in that tank, it will burn out the element, and it will need to be replaced. So before emptying this tank make sure, the electric elements are off, from the switch inside to the service switch on the water heater, or even the breaker inside your RV. That way we won’t run into troubles down the road.
So anyway, back to our water heater. I’m going to drain this guy off right now. So we’ve got the plastic plug down here below, as I mentioned. So I’m just going to loosen this guy up. Now to relieve the pressure on the hot water heater so we don’t get a blast of water coming out here, I’m just going to crack this relief valve, which will also help it drain out a little better. It’ll let some air go into the top of the tank as we’re, emptying the tank out. There’s the plug. There’s our water coming out. Relief valve’s open, so a good flow of water. When you put this back in, you’re going to want to put some Teflon tape on, or some Rectorseal to seal that up, so you won’t have any leaks in the spring.
So after we’ve dumped out, hot water heater from the outside of the unit, what we want to do is use that approximate location to find the back of the hot water heater inside the unit. This particular one here is located in this cabinet for us. So what, what the water heater bypasses and what you’re going to see on the back of the hot water heater when you access it is a series of valves or maybe one valve. What we, we don’t want to put six gallons of antifreeze in that hot water heater tank. So what we want to do is connect the hot and cold plumbing lines together so we can go ahead and winterization the hot and cold side of our camper without filling up that tank. So this guy here is the three valve system, which we’re going to see in older campers that are out there. What I’m going to do is just turn these valves in the opposite position as they are right now. Right now they’re in the use position, so we want to turn them into the winterization mode. So cold line off. Outgoing hot off. And our connector pipe between the two, we went to put that on so the antifreeze can travel into the hot side of our plumbing system.
So what we’ve got here in this particular unit is, the single valve system, which we’re going to see in some of the newer product out there. And, they’re using, a check valve in the top of the tank, rather than the three valve system. So all we need to do, right now that valve’s horizontal, that’s the use position. But we need to go flip it to vertical. That way we’re allowing the antifreeze to flow up, the connecting pipe and into our hot water plumbing system.
All right. So, I know where the particular water pump is in this unit. If you’re not sure where your water pump is in your unit, you can go ahead and, turn the water pump on and listen for it audibly. You will hear the pump run. It’s not going to hurt to run that pump dry for, a few minutes while you locate the pump. Once you’ve located the pump, then we need to go ahead and access it. I’ll just finish removing my screws here. And down below here I’ve got my, water pump. In this particular coach we’ve got the jet pump, so I’m going to be using, this fitting here that works in conjunction with the jet pump. Now, to, to figure out which side is the incoming end of the water pump where we want to hook our hose to to draw the antifreeze from, how I typically do it is, there’s going to be a flex line coming off that pump, going usually to the underbelly or to our water tank where our fresh water is held. On the other side of the pump you may see a T or some hard plumbing to it. So usually that single flex line is going to be your incoming side of the pump.
So what I’m going to do right now is undo that. You might get a little water run out there from the head of the pump. That’s what the paper towels are going to be for, to clean up a little bit. Now I’m going to install my winterization hose, which I’ve done here. And again, if you’ve got a Sure flow pump, which is going to be a, a metal case with a, with a black head on it, we would use a 1/2″ male pipe thread, where the jet pump is a quick connect fitting.
Here we are with our antifreeze. I’ve got my hose hooked up. This particular one, I think is going to work best for me to set this down here to draw from. I’m going to go ahead and insert my hose into the antifreeze jug. Then we’re going to go, turn the water pump on and start running our faucets. Now, before we turn the water pump on, we want to make sure all the faucets are closed. We’ve already also done our hot water heater bypass, so with all the faucets closed, we’ll turn the pump on and start winterizing.
Here I am at the kitchen sink. I’ve turned my water pump on. We’re starting to draw out of that, antifreeze jug that we just hooked up. So what I’m going to do now is turn the cold water on, and I’m going to run it till I see pink. It’s pushing some air out of the system. And there’s a good pink flow. I’m going to do the same on the hot water side. Now sometimes, I’ve heard before that it’s best to run, you know, the farthest sink away first, and then work yourself towards the pump. I’ve done thousands of these, and I’ve never had an issue, and I don’t, there’s no real rhyme or reason. I just make sure that I get a good pink flow, on every faucet before I put it away. The pex plumbing will take freezing, even if there is a little water in it. It’s our fixtures and our, our connections, the plastic fittings, that do not take the freezing. They will crack. So, I usually just start with the closest faucet to me and run both until I see pink.
Same with the bathroom sink. Nice pink flow there. And again on the hot water side, and we’ve got good pink there. So next I’m going to do the toilet, and this guy here is a foot flush. So I’m just going to, flush the foot flush till I see a good flow of pink to get it up in that valve there. Here we are in our shower, and I’ve, removed the, the shower head and brought it down here so I can, can kind of control the flow. Again, cold, hot. Now I’m going to run it up through the shower head. And I’ve got good pink everywhere there. So we’re good to go. Some people will actually undo the shower head, from the faucet to alleviate any water or antifreeze that may sit in there through the winter months.
So a lot of coaches are coming equipped now days with some sort of outside shower or hot and cold running water outside, so we want to make sure that we get that. I can honestly say that I’ve forgotten it in the past. So, just make sure you put this on your list of things to do. So, again, turn the water on till you see pink. A good way to see it out here is run it against the body of a white coach, make sure that you’ve got the water out. And we’ve got good pink there. Before I came outside, I switched over my antifreeze jug, because I noticed it, I was running a little bit low. And you’ll have to do that throughout the process, depending on, how much you use, obviously. So. Anyway, the system is, winterized with the water pump. We’ve got one more step and we’ll be done.
To complete our last step, and this is a very important thing to do, after we’ve done all the water receptacles, i.e., the sinks, the toilets, the outside showers, everything like that, really important, we need to come back in the coach and turn off our water pump. The water pump pressurizes the system at about 40 PSI. So we want to turn that pump off so we no longer need to pump antifreeze through the system. And the next thing I’m going to do is I’m going to come in and I’m going to open the cold water faucet. So I’m relieving any pressure on the system whatsoever, and we need to do this to winterize the city water fill. So, now you can see this has stopped running. I’ve alleviated all the pressure on the, on the water system. Now we can go outside and do the city water fill, and we’re going to be done.
So after we’ve turned off the water pump inside, and, we’ve relieved the pressure on the system, we want to come outside to our city water fill. And this is where we’d hook our garden hose if we were at the campground. And this often gets overlooked, and I’ve seen a lot of them change because of it. So first thing we want to do is pop this screen out here. And there’s a check valve in here, so when we’re using our water pump, water doesn’t spray out the city water fill. Now, if I were to press this in while it was still under pressure, it would allow me to press it in, but it ruins an O ring in there. So that’s why it’s really important to alleviate that pressure on the system that the water pump has provided for us before we push this check valve in. So now with the water, off, pump off, system we left the pressure, I can go ahead and pump this in and you’ll see water run out. I’m just going to hold that in there, and now I’ve got antifreeze. Our system has been winterized.
All right. So after we are done with our city water fill, what I like do is I take the paper towels that I mentioned earlier in the video. I like to tear off a couple of them and kind of leave some in the base of my sinks and my shower. That cleans up the little bit of antifreeze that, may have been left in the sink or the shower. I also, it’ll catch any residuals that will come out of here. If you have any antifreeze left in the jug, from your winterization process, you can go ahead and pour the extra down the trap. It’s a little bit extra line of defense there. Again, all these things can be purchased, at our Pete’s RV online store. That can be, accessed from PetesRV.com. There’s pump converters and things out there that might make your winterization process easier.
The other thing with this video that we’ve just made is, I kept it very simple, down to basics on this. There is some devices out there that do need attention that I did not mention in this video, sewer flushes, washer and dryers, ice makers, things like that. That’s stuff you really want to bring to your local dealer and have done. That way you won’t have issue with it in the spring. But, this, this should, get you going on where you need to be, and maybe give you little pointers, and I hoped you learned something. So thanks again for watching Pete’s RV TV with, Randy here today. Again, you can come see us at Pete’s RV online, http://www.PetesRV.com. Visit our online store [petesrvparts.com], or our Facebook page [facebook.com/petesrv]. We’ve always got some great things going on there as well. So, thanks again for thinking Pete’s RV, and happy camping.
Pete’s RV Center is an exceptional dealership group serving the United States and Canada since 1952. With multiple locations, Pete’s RV provides sales, service, parts, accessories, and education to our community of RVers all across North America.
Pete’s RV-TV YouTube Channel resident Randal Murray is here to give you all a quick tutorial on how to properly care for and maintain the seals around your RV that need to be caulked. Randy wants to show you how to help properly maintain your RV for years of enjoyment, and one fix that he sees a lot of people attempt, and not always do well, themselves is resealing seams on the RV with new caulking.
First off he goes over what you are going to need to do the job; proper caulking for the surface, a quality caulking gun with stopper, oder-less mineral spirits, clean rags and sometimes a razor blade to clean out dry, cracked caulking. To begin with Randy wets a rag with mineral spirits to clean and prep the surface he is going to be sealing making sure to get the entire area including behind the wiper seal. Once everything is cleaned and dry you can get your caulking ready to use and set up in the gun. Make sure not to cut too large of a hole in the caulking tube as too much can interfere with doing a proper job. Placing a thin bead of caulk along the seam, Randy works his way in a single, fluent motion. The key to doing this job is using the mineral spirits on your finger to help press and spread the caulking into the seam, giving it a professional look and tapering each side to help shed water. Make sure to not do too long of an area, start small and slow so you can work your way up. The same process is done for a vertical seam as well, but make sure that you start with a clean tip to ensure you get a seamless bead.
Video Transcript for “How to Reseal Your RV”
Randal Murray: Hey guys, Randy with Pete’s RV TV today. Another quick tip segment for you.Today we’re in the Burlington, Vermont location shop and I want to show you how the industry puts on these great looking caulking jobs to seal up our corner moldings and the base of our slides and other areas around the coach. I see a lot of units come in where customers have done their own caulking job and they just don’t look so good and they’re not sealing very well either. So let me show you some tricks that I use when I do it. It makes it look good and makes sure that we get a great seal.
So first of all, a few things that we need. We need some caulking, and if you go to your local RV dealer or come to us, we’ll show you the best stuff to use for the right surface and the right job, so we’ll instruct you on that, and any local RV dealers should be able to take care of that. I also like to use a quality caulking gun. Now, there’s one that you can buy that costs like $1.99 at the big box stores, the Home Depots, the Lowe’s and things like that. This one is actually a little bit more expensive, about 15 or 20 bucks, but it’s a lot more manageable and it makes the job a lot easier to do, so I do recommend if you do own an RV, invest in a good caulking gun and you can use it for other things around the house as well. This actually does have a stop on it so I can stop pushing. So the caulking is not coming out of the end of the tube and just very nice control on Very easy to use. So invest in good caulking gun.
One of the most important things that makes me look good too is odorless mineral spirits. Odorless mineral spirits is the active ingredient in a lot of the caulking out there. This is the one we use. I like the odorless ’cause it doesn’t stink quite as bad and it’s super easy. It’s just a light duty paint thinner, but it’s going to help us work the caulking and clean the surface as well, which is very important. So let’s get started. So we can get sealant gaps on our coaches from them just being used. Only roll a camper down the road, it’s like putting your house through a 3.4 earthquake on the Richter scale every time it moves. So lots of moving parts, lots of things that can open up for sealant gaps and we need to maintain these just like we maintain the seals on our roof. So first thing I do is I’m gonna clean the surface before I go ahead and apply. So I’m just going to take white rag here and I am going to put some mineral spirits on I go ahead here. And I fold it up just for ease of use. Now I don’t need to soak, soak the rag, but I do like to get it damp, kind of like that. I also always have another clean rag on me as well, so we want both of them. So let’s clean the area here at the base of this slide. And I’m just going to take the mineral spirits and just wipe the area that I am going to clean and that’s going to help get the dirt off the existing caulking, clean the surface, and allow us to get good contact and good adhesion when we apply the caulking. So I’ll get that wiped down pretty good. Get all the dirt and grime off, tuck back my wiper seal there in there. If the caulking is really old and dried and cracked, we probably will want to remove that with some sort of razor or some sort of scraping blade. This one’s not too bad, so I don’t need to get that tool out, but you may. We don’t want to go over bad caulking and we want a real flat surface to make sure that we get a good looking caulking, a joint, and a good seal. If it’s really bumpy, it’s going to be really hard to maintain that quality of the look and the seal and ensure we have no leaks. So get this cleaned up pretty good there.
Now, I’m going to take my caulking. We’ll set this here for a second. The other thing that I see a lot of people do is they put way too big a little hole on the end of the caulking tube. We do not need a whole lot of material and having too much material is going to actually make it not a good looking job and hinder, uh, our sealing process. So I’m going to take and just put a small, small hole in this. I’m going to put it at about a 22 degree angle too. That allows me just to work it a little bit. I like it to be nice and straight at my angle, that way I’m not pushing into the caulking when I’m doing it, so it looks pretty good. Put my knife back in my pocket here. And I’m going to fill the tube. I don’t know Karl, if you can see that white coming up through that clear plastic tube there. I’m going to get it to the end so we get all the air and everything out and I’m going to stop it by hitting my button on the back of that good caulking gun that I just referred to. So our area is clean. I’m going to take the dry rag and just wipe any excess off from a cleaning process, make sure we get all the dirt, all the mineral spirits and everything off, and then we’re going to go ahead and start to apply. Again, I’ve got my mineral spirit rag in my hand because I’m gonna use that here in a minute. It’s gonna become very important.
So now I’m gonna pump this thing up and I’m going to start to apply and I’m not going to put a huge bead. I don’t need huge bead. Kind of pushing it into the crack, into the transition, right straight across. We’ll stop right there. Don’t go too far because you want to be able to work the area that you’re doing and if you go too far, you may start getting a skim coat over the top of it. So now this is the trick that separates the men from the boys. After we get a small bead on there, I’m actually going to take that wet mineral spirits soaked rag, mineral spirits soaked rag, and I’m going to put a little on my finger and this is where we get a good looking job. So I’m actually going to take my finger and I’m going to go about four to six inches and then I’m going to clean my finger and I’m going to continue that process down my whole caulking joint. What that does is it pushes it into the crack, seals any cracks that are there. It also tapers, so we get a nice transition. We don’t have a place where water is going to sit or moisture is going to sit. We’ve pushed it into the crack and we’ve finished it off and I’m actually going to go back to the other way and just get any excess off. Well, Karl, if you want to take a look at that, that’s not a horrible looking caulking job. We’ve tapered both the edges. We’ve pushed the caulking into the crack. We don’t have a ton of material on there. We don’t need a ton of material on there. Any water that runs down the slide box will go right over that caulking joint right off the side of the slide box, just the way we want it. Now, that was easy. That was the horizontal one. Let’s do a quick vertical one here just so we can show you that as well, and it’s gonna be kinda the same way. Gonna take my mineral spirit damp rag here. I’m just going to clean the area. Get that dirt and debris off there. Make sure I got good adhesion. Clean the area up really good. I’m gonna take my dry rag and again, get any of the excess off, dry it out where I run my caulking. Back to the caulking gun. Again, notice it’s not continuing to push out because I have a good caulking gun and I can take the pressure off it very easily. I’m going to make sure I clean the end of my gun so I’m starting fresh. I’m just going to go up here and again, start that bead. Nice, easy, small bead. I’m pushing it into the crack as I go. I don’t need too much material. If you get an air bubble, you can back up a little bit. Not a big deal. We’re just going to go down, nice fluid motion. Make sure to only do what you can work as well, so if you can only do two or three feet until you get good at it, just do that. Back to the mineral spirit rag. I’m going to put it on my finger again and I’m just going to start drawing down, again cleaning my finger about every three or four inches. The mineral spirits is going to give us a little bit more working time as well, and I’m just doing a light touch here, giving it a nice taper. I’m just kind of feathering it in so you can’t see where I’ve started and stopped. I’m going to go down there and you can see how quick and easy this is. Karl, if you want to take a look at that job there, and that’s how the guys do it at the factory and it’s super simple to do. Nice and easy. It looks professionally done and we’ve got a great seal, a great taper, and we have penetrated both sides of the surface plus sealed our joint.
So if you do my couple little tricks here with you’re caulking gun, get a good caulking gun, use mineral spirits, make sure you dampen your finger. Don’t put too much product on, all that’s going to do is push out and get all over the place and get real ugly while you’re playing around with trying to clean that up, the other stuff’s going to skim over and make it really hard to work. So if we just do a little bit, taper it in, keep things clean, there’s no residue left on my finger when I’m done. Life is good. That’ll seal all your cracks. That’ll make a great taper and a great looking caulking job when you’re done and they’ll take a professional did it, not just you. So thanks again for watching Pete’s RV TV with Randy today. I look forward to seeing you on the road, and happy camping!
Pete’s RV Center is an exceptional dealership group serving the United States and Canada since 1952. With multiple locations, Pete’s RV provides sales, service, parts, accessories, and education to our community of RVers all across North America.
Pete’s RV-TV YouTube Channel Resident RV Expert Randy Murray discusses a multitude of ways to clean your gray/black water holding tank sensors, clearing all inaccurate monitor panel readings from your camper. Sometimes you may get a full tank reading on the monitor panel inside your camper even after you’ve dumped your gray and black tanks.
Randy notes that this is generally caused by a build up of waste materials or anything that might have made its way down the toilet. These items can block the sensors preventing the correct read out.
Randy provides a few preemptive approaches to make sure you won’t have to deal with that faulty reading. The first is making sure before you flush that you add extra water so the toilet paper (making sure you use RV toilet paper) won’t clump up or dry out to the inside of the tank walls, the next is making sure the tanks are as full as possible (making sure not to overfill) before they are dumped.
Randy suggests the use of a tank flush chock to assist in filling your holding tank before it’s dumped. The good news is that there are other tools for when all else fails.
The first one Randy recommends is what’s called an RV swivel stick, which he explains attaches to a hose and sprays around water at a high velocity to break down any tank buildup. Depending on whether you own a travel trailer or fifth wheel, a longer flexible version is available for the harder to reach holding tanks.
Lastly, filling up a 5 gallon bucket with hot water and pouring it down the toilet should help alleviate the issue by steaming away the blockage from the sensors.
Video Transcript for “How to Clean Your RVs Holding Tank Sensors | Pete’s RV Service Tips”
Hey guys, Randy with Pete’s RV TV again with you today. Another quick tip segment for you. Have you ever gone out on a camping weekend, and you’ve dumped your tanks after the weekend, and you come back into your camper, and you get a false reading on your black or your gray tank kind of like that.
Looks full and you know it’s not. You just dumped it. Well, I’m going to take you into the bathroom here in just a few minutes, and I’m going to show you a couple of tricks to alleviate that problem for you. So let’s go take a look into a bathroom.
Alright, so here we are in a bathroom at one of the RVs we have here at the shop at Pete’s RV Center. Kind of an awkward place to have a conversation or shoot a video, but here we are anyway. Good information. So as I was mentioning earlier at the monitor panel, you know you’ve dumped the tank but it’s still reading full on you monitor panel.
How this happens is we have black ABS plastic tanks underneath our RV which are our holding tanks, our waste water holding tanks. And we actually spin weld metal sensors into the side of those tanks and hook wires to them that go back to that monitor panel. So we use continuity of what’s in the tank. We especially see this happen on the black tanks because some slime, and some sludge, and whatever else we throw down the toilet gets caught up on those sidewalls and will actually give us that false reading.
So a couple important things I want you to do while you’re camping that will help alleviate this, or make it easier for you to clean it if the problem does arise. when you have solids or paper present in the toilet bowl, I need you to fill up that toilet bowl before you dump.
Obviously if you’re dry camping, this is going to be a little harder for you to do because you want to get as much longevity out of that tank if possible. But if we’re at a campground where we can dump whenever we like, this is a great way to do it. So if there’s solids or toilet present in there, I want to see you fill that bowl up with water. I want to get as much water as I can in that bowl before I dump.
What that’s going to do, is it’s going to do things for us. It’s going to put more water into the tank, and it’s also going to help solidify anything that we put in the tank in conjunction with our toilet chemical. Make sure you’re using the appropriate RV toilet paper.
Any toilet paper that is built for a chemical toilet will work on this. It breaks down a lot quicker than some of the household toilet papers we use for septic systems, so important to do that. So we just fill that guy up and dump it, as much water as we can. Most of your today’s toilets out there will have a way where you can step on it halfway and get some water to it, and that way we’re going to get as much into that tank as possible. If you do that that will help out.
The next thing you need to do, if it does arise, especially when you’re at the campground where you can dump where you want, we’ve got these couple of little options here that work really good. And a lot of today’s new units are coming with sewer sprays on them or some kind of tank wash spray that is hooked up to the side of the unit that actually sprays inside that tank.
Here’s a couple of options that we sell in our store. We call them swizzle sticks in the shop. Heh. You hook the garden hose to this end. It’s got a little on and off valve, and it’s actually got a sprayer that spins around at a very high rate of speed down here and will actually wash the side wall of your tank.
Here’s one that’s a little bit longer. If you own a fifth wheel, this is going to be tough to do because usually the tanks are very far away from the toilet, which are not in a travel trailer situation. So fifth wheels are a little bit tougher to do. So you can use those methods.
Another method that I use when I’m at the campground is before I leave, if my tanks are getting full, I’m going to fill that tank up with water. Now, be careful when you’re doing this because you don’t want to overfill the tank and have a mess or have it come up the toilet, but I want to fill that tank up. A lot of people I see at the dump station here at the dealership, they’ll bring a garden hose in or dump it.
You can also purchase one of these guys here. This is what my prep techs use when they are prepping a camper out to make sure everything’s working properly. They’ll drop that right in and it will keep the water on while it’s filling that tank. Again, make sure you keep an eye on that tank, because if this comes up through the toilet it’s not going to be a fun thing to clean up.
Once you’ve got that tank filled, let it sit for an hour or so. Maybe do it in the morning on the last day there, while you guys are picking up. Then go ahead and pull that valve. Now that water that’s in that tank is probably going to clean those sensors off. Sometimes I’ll even put a little chemical in there. That should clean it off, get everything taken care of for you in conjunction with one of those swizzle sticks there, and the extra water we put in. That should keep those tanks reading clean.
Now, if you have one that’s not … again, typically it’s the black but sometimes I do see it on the gray. You can fill up the gray the same way. Even put a little toilet chemical down the gray and it will help out with odors. Gray odors are just as bad as black odors. I’ve had tanks apart and they really stink. So pour a little toilet chemical down in that gray water you’re using before you dump as well. It’s not going to hurt anything, plus it will keep the sensors clean.
On the really hard to clean sensors, or if you have one now that’s been dirty for a long time and are reading full for a long time and you want to get that one done, warm water. I’ll take and fill up a five gallon bucket, and I’ll dump it down the toilet of an empty tank with, of course, the valve closed on the outside. And the steam from that warm water will actually help loosen up any solids that we might have stuck to one of those sensors inside the tank. I’ve done that on numerous occasions and had very well, great, success with that as well.
There is also product that you can purchase at an RV store that you can put. It’s called a tank sensor cleaner. I put that down in there, or toilet chemical cleaner, or toilet chemical works pretty well as well. And if it, again, it’s one of those tough ones, let it sit in there for 24 hours before you dump. Even if you’ve got to take it home and bring it to the RV dealer a day or two later after letting it sit in there. What that liquid is going to do is, it’s clean liquid, it’s going to just soften up all the material on the side of the tanks that may be giving us that false reading.
Now, on the rare occasion that doesn’t clean it out, you may need to add a new well nut or something on there. We do do that occasionally at the dealership. But those tricks that I’ve just shared with you, that gets it about 95% of the time. Hopefully, if you’ve got one of your tanks and you try my tricks, it’ll help you get that reading at empty so you can have an accurate, you know, know what’s going on in your tanks and know how full they are before you dump them. Really important with the black tank.
Once again, let it fill up as much as you can while you’re using the RV before you dump. This is going to help us evacuate the tank properly and can keep those tank sensors reading clean. And it’s also going to give the chemical enough time to break down the solids and break down the paper.
So use a lot of water if you can, if you’re not in a dry camping situation. If that doesn’t work for you and you still get a false reading, fill the tank up with water, let it sit for as long as you can before you dump. That should clear out. If it’s a real toughy, get yourself five gallons of hot water and dump it down that toilet. Let that sit around for a little while, and that’ll actually steam the sensors. And then you can go ahead and flush the tank really well. And you can try the products that I showed you earlier, the swizzle sticks and things like that.
So hopefully this helps you clean those tank sensors. Thanks again for stopping in, checking out our quick tips with Randy. And always check us out on our Facebook page, and we’d love to see you on the YouTube channel as well. Thanks for thinking of Pete’s RV and happy camping.
Pete’s RV Center is an exceptional dealership group serving the United States and Canada since 1952. With multiple locations, Pete’s RV provides sales, service, parts, accessories, and education to our community of RVers all across North America.